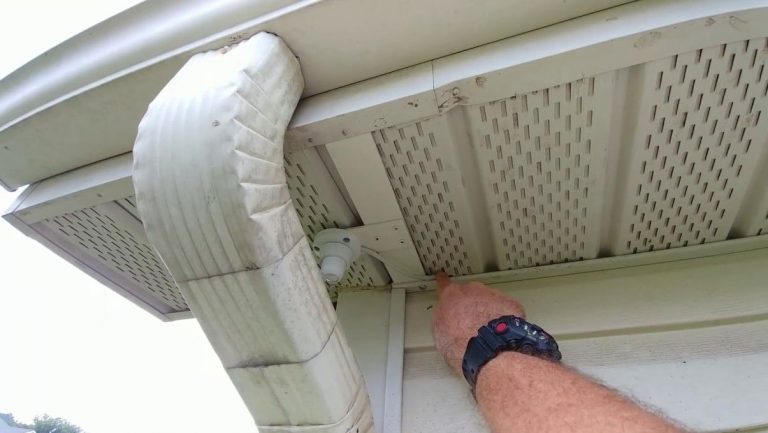
A lot of customers and homeowners always ask if is it possible to install security camera on aluminum soffit?
Well, the answer is “yes” security cameras can be installed in any location including aluminum soffits.
In the past, security cameras were installed in specific places in the house such as brick walls, concrete buildings, and wood soffits.
Nowadays, there are different materials that are used in soffits like wood, vinyl siding, and aluminum.
These materials are very common and used widely. For example, people use Aluminum in the attic because it is light, sturdy, and handles easily.
The aluminum soffit gives us an elegant full roof finishing. It also serves as a shielding system for our walls from harsh weather. Moreover, they are highly flexible and long-lasting.
Some people think that it is a very difficult task to install security camera on aluminum soffit.
But in reality, it is very easy. We have mentioned a step-by-step installation guide that is suitable for beginners and professionals.
In our previous blog post, we covered how to install a security camera on Vinyl siding in detail. Check it if you’re interested.
Now, Let’s See
What are the tools required to mount a Security Camera on Aluminum Soffit?
To install security camera on Aluminum soffit in the correct way, you should have the right tools to help you finish your task.
Depending on your experience in installing surveillance systems you may finish the task in an hour or maybe less.
Below are the items required for the camera installation process on the aluminum Soffit:
- Wired IP camera or Wireless cam.
- Soffit camera mounting plate.
- Ethernet or Coax cable.
- Powerful drill.
- Sharpened Knife or Cutter.
- Drill bits.
- Screws.
- Chalk or Pencil.
- Hammer.
These are the tools that we used in our previous work during installing CCTV security cameras on the soffit.
Note: The type of cables and the video recorder device whatever DVR or NVR depends on the system you’re using in your home, office, or company.
For Now, Let’s started
How to Install Camera on Aluminum Soffit Steps:
Day after day security cameras is developing and adding a lot of different features to make our life easier than before.
The same with the installation security cameras are developed and can be installed at different locations, It can also be installed on the soffit without hiring professionals in easy straightforward steps.
So, to install security camera on aluminum soffit. First, Select Suitable Location For Cameras, then Prepare the Place and remove the Aluminum. Second, Use Chalk or Pencil to mark signs for Screw Holes, then Turn on the Power Drill and drill the Holes. After that, Run Security Camera wires through the attic and Install the Mounting Bracket. At last, Attach the Security Camera and Turn-On the Power Supply.
If you don’t understand the short brief of the step-by-step installation guide, Don’t worry!
Below words describe in detailed the steps to install security camera on aluminum soffit in a short time just follow the procedures
Step #1: Select Suitable Location For cameras
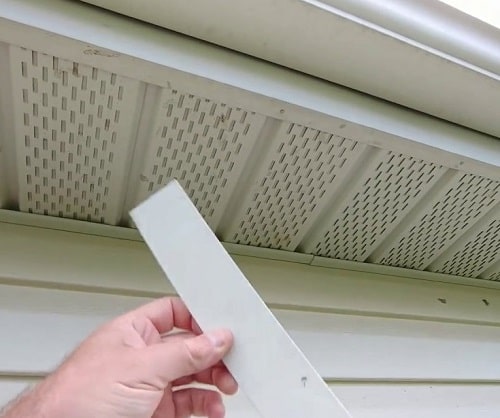
Firstly, for any security camera installation under eaves, you have to plan the whole system and select the most suitable angle.
So, when you start to install security camera on aluminum soffit choose the location from where you monitor the maximum desired area.
Another important thing to consider is that you place the camera at a medium height from the ground.
In case you mount the cam too high with an unsuitable angle it will not record a clear image.
On the other hand, if you put the cameras at a low height then burglars, or anyone can damage them easily.
Here are The best locations for security cameras according to our expert advice:
- Home main door.
- Back door.
- Above the First floor window.
- High on Fascia.
- Soffit Corners.
These are the most common placements for installing cameras on soffits whatever the material used.
Read How to Install Security Camera on Fascia If you're in interested in mounting cameras on soffit parts.
Step #2: Prepare the Place and remove Aluminum
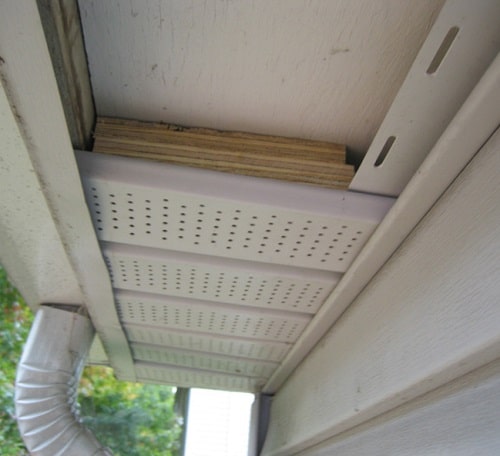
The second step in installing the security system on Aluminum soffit is to prepare the place first.
Once you clean your camera locations from any obstacles that may affect the installation process, then remove the aluminum part of the soffit.
Use the sharpened knife that you have or the cutter and start to cut the Aluminum surface carefully. Move the Aluminum part backward and forward till it removes.
After removing the required part, put a piece of wood beneath the aluminum soffit to fix the camera and protect it from damage in the future.
If you find this task too hard for you to do, you can keep everything in its place and use the sharpened knife to make a round hole in the aluminum. But this solution is not effective as the first one.
Step #3: Use Chalk or Pencil for Screw Holes
Now you’re completing 50% of the installation security camera on the aluminum soffit job.
The next step is to bring the removed piece of the aluminum soffit and mark signs for screws.
First, take the mounting template present in the security camera mounting kit.
As we know soffit security cameras are different so they have different mounting templates.
Second, keep the template mounting plate on the soffit. and use the chalk or pencil to make signs for screw spots on the cam.
Note: Make sure that the screws signs are clear enough to help you while drilling holes.
Step #4: Turn on the Power Drill and Make Holes
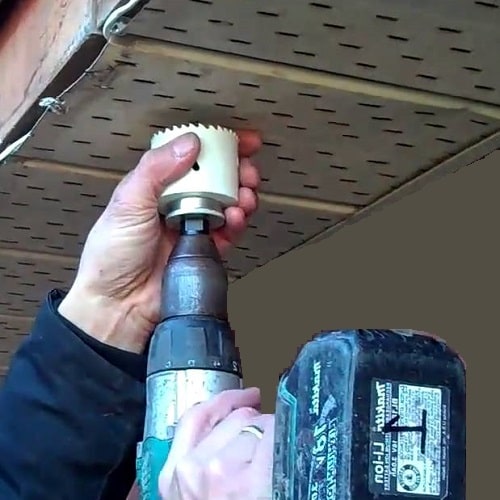
The next step is to turn on the power drill and start to make holes for screws and camera main cable if you have a wired analog or network system.
First, Turn on the power drill and make holes in the mounting plate by using a suitable drill bit.
Second, Change the drill bit and make a big hole in the middle of the template for the camera feed cable.
Now you’re finished making holes and it’s time to run the security camera cables through the attic.
Note: In case you have a wireless or wire-free security camera you can skip the next step and move to the further step.
Step #5: Run Security Camera wires through the attic
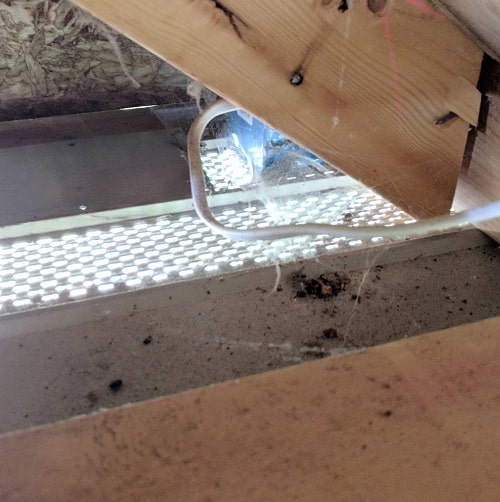
The above steps are easy to do and you can do it with yourself. It’s a DIY task but the next one is not.
Running security camera wires through the attic is considered the hardest part to install security camera on aluminum soffit.
You need to ask a friend for help and purchase fish tape to help you pass the cables of the camera easily inside the holes.
First, Pass one end of the fish tape inside the camera hole and pull it until you reach the central device (DVR/NVR) location.
Second, match the cable you’re using in your system with whatever Coaxial or Ethernet cable to the fish tape.
After that, put a small piece of adhesive tape to protect the connections between wire/ cable and fish tape.
Third, ask your friend or any one of your family members to pull the fish tape, and when you reach the camera point pass it carefully through the main hole
Once you finish passing wires and cables of your system through the soffit you have almost done 80% of the task.
Note: The only thing to keep in mind is that when you are installing a wired security camera don’t pull the wire strongly when passing it through the holes. Because it can cause damage to the camera.
Step #6: Install the Mounting Bracket
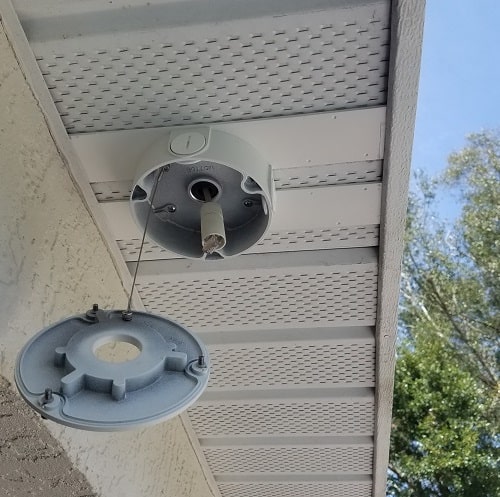
Before you start attaching a security camera to the Aluminum soffit you should install the camera mounting bracket or camera base at first.
Each security camera has a mounting bracket to allow users to mount their cameras anywhere they want, the mounting bracket may be a flat base or long arm.
So, Turn on your screwdriver device and hold it with steady hands and start to fix the camera with the screws.
After that, tighten the cam screws and you must ensure that the screws are passed to the wood piece mounted behind the aluminum soffit.
Once you finish this task, install the removed part of the aluminum surface again in its place and make sure it covers the cam wires.
Step #7: Attach the Security Camera
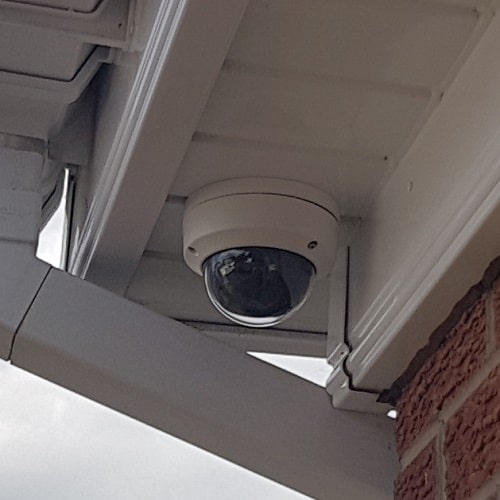
The final step in how to install security camera on aluminum soffit is to attach the surveillance camera to its mounting base.
Bring your camera from the package box and carefully attach the camera to its arm or mounting bracket.
Some types of security cameras have a magnetic base like Blink Wireless cameras.
On the other hand, there are some cameras that have a protective housing attached to the mounting bracket with screws such as Wyze, and ring cams.
Depending on your system camera type and the mounting piece used attach your cam and adjust it to the best viewing angle.
Step #8: Turn On the Power Supply
Now, it’s time for you to test what you have done and see how your installed cameras on aluminum soffit do.
Check the connection joints and screws, When you are sure that your camera will never fall and you have tightened all the screws.
Complete the installation of DVR Security Camera System, and then turn on the power supply and monitor footage of the desired location.
Tools Recommendations
A lot of beginners start to install security camera on aluminum soffit without using the correct tools which affect the system efficiency and cause problems for cameras in the future.
So, before you commit the same mistake and also to add more protection to your system, you should install according to the manufacturer’s guide by using the right tools. Here are our favorite pieces of equipment for the aluminum soffit installation process.
1- NoCry Safety Glasses: Eye Protection glasses to use while installing your system.
2- DEWALT Hammer Drill: Powerful Hammer for making holes.
3- BOENFU Wire Cutter: 6 Inch Cutting Pliers.
4- Little Giant Ladders: Multi-Position Ladder to help you in heights.
5- Ximytec Screwdriver: Cordless screwdriver to tighten any screw.
6- Swann BNC Coaxial Cable: 100 Ft / 30 M cable for CCTV System with analog cameras.
7- ZOSI Cat5e Ethernet Cable: High-speed 100 Ft / 30 M Ethernet cable.
Conclusion
We have discussed the easiest steps for the security camera installation on the soffit above.
Also, have discussed the list of equipment necessary for the procedure. We have offered different solutions and choices in case of any difficulty.
Overall work is very easy, it only needs your proper attention. Because most people found it a very complicated job.
But actually, it is not, you can do it on your own without expert advice. So, carefully read each step, and instruction and follow the steps mentioned above for the quick and proper installation.
