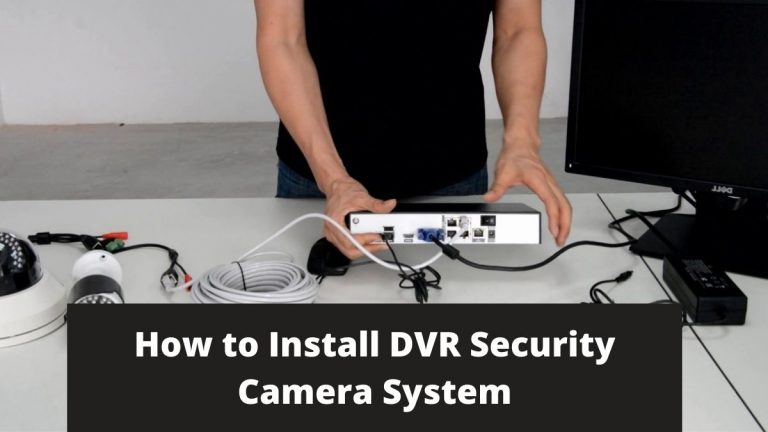
Maybe you want to install DVR Security Camera System in your home, office, or garage but don’t know how to do it.
Well, installing a DVR security camera system is an important thing that you should learn before purchasing the surveillance devices.
Nowadays, CCTV analog security cameras and Digital Video recorders are widespread devices and used by a large number of customers and homeowners.
People love to have a DVR surveillance system and consider it one of the best safety equipment to pick because of its high efficiency and affordable prices.
In comparison between NVR vs DVR, there are many features in DVR that don’t exist in the Network Video Recorder.
For example, the DVR can work with different analog cams such as CVBS, HD-TVI, HD-CVI, and HD-AHD.
What are the Tools Required to Install DVR Security Camera System?
To make your DVR security camera system work normally without wiring problems or software issues, you should install it in the correct way.
The right way to do this task is to have suitable tools for every step of your installation process and to ensure that every piece of equipment is existing.
So, here are the important requirements for Installing a DVR Security Camera:
- High Analog HD security camera.
- Digital Video Recorder (for storing Videos and images).
- Tv Screen.
- Coaxial Cables.
- BNC connectors.
- HDMI or VGA cable.
- Power adapters.
- HammerDrill.
- ScrewDrivers.
These are the most common tools that I have used before in mounting my CCTV cameras analog system.
Now, Let’s see the steps of
How to Install DVR Security Camera System
Installing a DVR security camera system takes a lot of time and effort if you’re a beginner.
On the other hand, if you have some experience and mounting surveillance systems before it will be much easier for you.

So, if you are a beginner or it’s your first time dealing with monitoring systems and doesn’t know how? Don’t worry
The below steps in this guide will help you and take you from a beginner/intermediate level to being an expert in installing DVR security camera systems in a house, office, or company.
Steps1: Select the System Location
The first essential and attention-grabbing step is to find a place for a camera in your indoor or outdoor area.
To install DVR security camera system correctly, the placement of cameras should be secure and away from people’s reach.
Moreover, you must ensure that the cam location is positioned in place to cover any coming person from the door.
Also, if you plan to mount your surveillance cameras outside make sure it’s protected against bad weather.
If you haven’t such a place, Don’t worry! There are some models of wired cameras now that are weather-resistant cameras.
The last thing that you should take care of in the system location is to
- keep your cameras away from light sources.
- Hide the wires and cables of your system.
- Put the cameras near the power outlet.
Step2: Drilling Holes and Mounting a Camera
Once you finish choosing the place. The next step in Installing a security camera with a DVR system is mounting the cameras.
First, Bring the mounting template that is provided with the camera box.
Second, start to mark the anchor holes and then the main hole for the camera cable.
Third, turn on the hammer drill and start to drill holes for screws.
For the camera main cable, change the drill bits and dig a hole that is wide enough to pass the cable.
Step3: Place the DVR
Now, you have finished the outside part of your installation process. The next step will be done inside your house, especially in where you want to place your DVR.
The selection of a DVR location is considered the hardest part of the whole process.
There are some important factors that you should keep in mind while installing DVR, such as
- The DVR system must be mounted away in a hidden place.
- The location of the DVR must be near your system cameras.
- Mounted close to the WiFi router in case you want to connect your system to the internet.
These are the most interesting things you should care about. There are other factors such as the placement of the DVR should be wide enough to place the monitor screen beside it.
Also, DVR must be in a place where you can lock the whole system.
In this way, you protect your system, and the chances to damage the videos and camera pictures are eliminated.
Step4: Plan The Route of Cables and Power Wires
Planning is the key to success for anything you want to do, the same principles of planning you want to implement in installing a DVR system.
In this step, you need to take measurements and decide the wire route of your system, the larger the system you have the more wires you will use.
So, you should plan the complete pathway and choose the shortest wire route for the connections between cameras, and for power wires also.
Short connections mean fewer wiring problems for your DVR system and avoiding security cameras wire splicing.
Running security camera wires in conduit or cable Raceway is a reason to increase the camera’s durability and the overall system.
Moreover, it ensures that your camera is protected from strong wind, Heavy Rains, and electric shocks.
Step5: Connecting Wires with Main DVR System
One important step to Install DVR security camera system in your house is to make the connections between system equipment correctly.
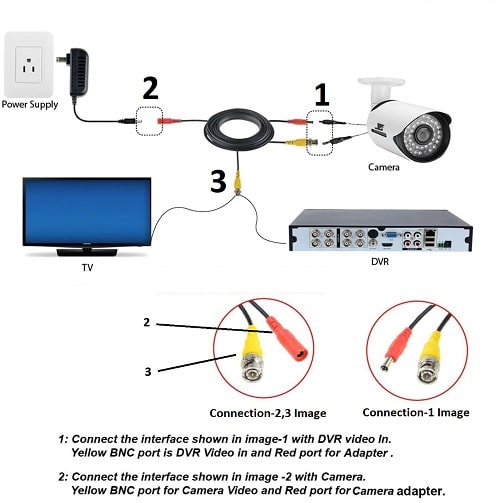
First, you should run the Coaxial cables from CCTV analog cameras, Connect the BNC male to the BNC female of the CCTV cam.
Second, take the camera Power cable and attach the DC connectors, DC male in-camera wires, and the DC female connect it to the power adapter.
Third, connect the BNC extension cable coming from the CCTV camera to the input port of the DVR.
Forth, link the BNC cable to the TV directly if your TV screen has RCA.
If not, you can connect it to the DVR, and from the DVR device use the HDMI or VGA to connect the DVR with the monitor to view your camera’s feed on TV.
Note: If you have a single camera you can connect a CCTV camera to a TV without a DVR.
Step6: Power On the DVR Camera System
Now, everything is almost finished about how to install DVR security camera system.
You need just to connect the power adapter of the DVR, and then turn on the whole system and see if the entire system works fine.
After that, make the camera settings according to the required setup guide, including both video and image quality, and also adjust where the DVR will store the recorded videos.
Step7: Adjust DVR Settings and User Interface
The last step in this guide is to check the DVR setting and see how each feature of the system works or not.
Setting a user interface is an essential step that everyone neglects and then regrets.
First, log in to the DVR page with the admin credentials username and password.
Second, Check the live viewing setting and port forward rules. This feature allows you to see what’s happening in your home on mobile, and PC while you’re away.
Third, If your cameras and DVR system have motion detection features with different modes, check the settings and choose which mode you need your cam to work with.
Fourth, since storage is important for your recorded videos, you need to have a large storage space if you have an HD system.
Pick a DVR with a high-capacity hard drive to save your footage for a long time without the need to delete them each week.
Before the end, you can use the above method and pay attention to every step to avoid damaging any part of your system, and you can watch the next video for more details.
Summary
Installation of the security camera in apartments, offices, and large places is not an easy step, especially for beginners.
If it’s your first time installing a system there are some steps that must be followed to keep the working smooth and free of errors.
Moreover, Make sure that all the elements and requirements must be of high quality. Don’t sacrifice the quality to save your money.
Follow the above steps and if you have any confusion about How to Install DVR security camera system, feel free to leave us a comment. Please read our latest blogs for more information.
Resources: Tool Craze

