Security cameras are a great way to keep your home or office safe, but if the lens becomes covered in condensation, the camera can become ineffective. So, what is condensation? And how to get condensation out of security camera? Keep reading!
Condensation on security cameras means moisture in the air has turned into water droplets, and it can damage your security camera.
These little droplets can obscure your view and make it difficult to get a clear picture of what’s happening in your home or office.
Anyhow, If you’ve ever been frustrated by the condensation that forms on your security camera, you’re not alone.
There are several ways to get rid of condensation and improve your security camera’s performance.
In this post, we’ll show you how to do it by sharing some tips on how to keep your security camera from getting condensation in the first place and what to do if your camera is already foggy.
Why Does My Security Camera Look Foggy? Possible Reasons
Well, as we mentioned above when condensation happens the moisture in the air turns into water droplets on the camera lenses.
This issue, there’re a lot of many hidden reasons that can lead to this problem. Let’s see some of them
Reason1: The Poor Ventilation of Security Camera
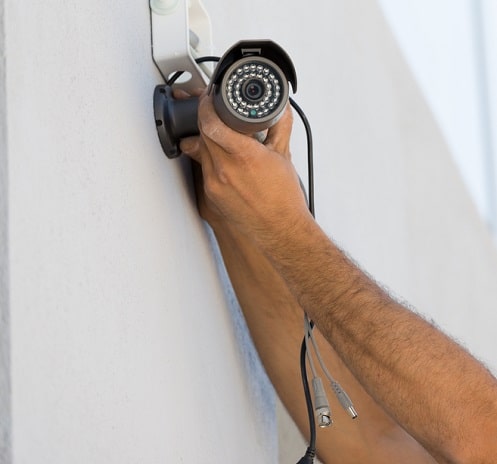
One of the main reasons that security cameras get condensation is because of poor ventilation.
What I mean is If the camera is not able to properly ventilate or is not perfectly sealed, the air inside the camera will get trapped and will start to form water droplets.
If you install your security camera in a warm place then you won’t suffer from this problem.
On the other hand, If you mount your surveillance cameras in humid environments this can be a big issue as these environments can cause the water droplets to form more quickly and can even make the problem worse over time.
Anyway, to prevent this from happening, it’s important to ensure that your security camera body is properly closed and there’s no way for the air to go out or in.
This can be done by ensuring that there is proper airflow around the camera and by making sure that the camera is not placed in a humid environment.
Reason2: Putting the Security Camera in a Cold Environment
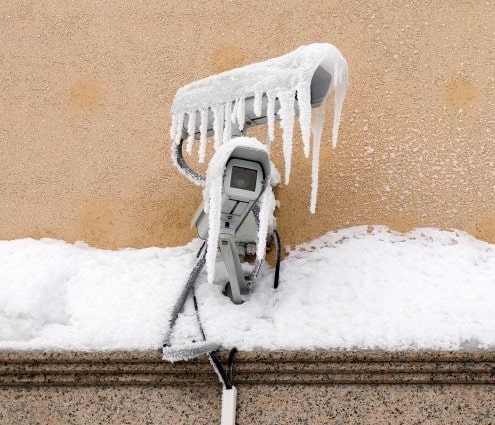
The temperature of your surroundings can also play a role in condensation formation. If the camera is placed in a cold environment, the water droplets will form more quickly.
This is because cold air can’t hold as much moisture as warm air. As a result, the water droplets will condense on the lens and will obscure your view.
Moreover, the droplets can mix with dust and make mud spots on the camera lens.
So, If you want to avoid this, place your camera in a warm environment. This will help to prevent the water droplets from forming in the first place.
Also, you can use one of the proven ways to make a security camera waterproof to stop forming of snow around your camera.
Reason3: Bad Location For the Security Camera
Most professionals agree that choosing a security camera location is one of the critical points in the installation process of surveillance cameras.
Based on your choice you can put your camera in a safe place away from people, and also rain, and water.
Or with a wrong decision you can put your cameras in easy-to-reach places that make it slick for anyone to damage them.
Aside from where you previously installed your camera, if you face the issue of getting condensation inside your camera, and want to get rid of this issue, then the perfect solution for you is to change the camera spot to a new warm place.
Whatever rain falls, or someone with no intention sprinkles water on the camera it will be safe and there’s no condensation will be formed.
Reason4: Use the Wrong Type of Security Cameras
If you’re new to the world of security cameras then you may don’t know that there are many types of surveillance cameras available on the market.
Some of them have a special shape, while others differ in the specifications and features that the camera offer.
One of these cameras is an outdoor security camera, these devices are designed to bear the outside environment and conditions so they can work for long hours without being damaged or stopped.
Additionally, these cameras are designed from weather-resistant material and they measure this by what is called an IP rating, this rating shows you if the camera stands against bad weather and rain or water or not.
The higher IP rating for the camera means the best protection the camera gets against harsh weather.
Sometimes beginners commit a mistake by purchasing indoor security cameras with low-quality materials and using them as outdoor cameras which causes many issues and getting condensation inside the camera is one of them.
Reason5: Neglecting Regular Cleaning
To get the highest performance of your security system you must set regular days to look at the cam and clean it if you see water, dust, or any shape of bird nests around your camera.
What I see in my career of installing and maintaining surveillance systems is many homeowners install the cameras, make the connections then leave the system work as it’s.
After a while, the system connections become bad and cause many issues such as faulty power, and making the system turn off continuously.
Not only that, the camera sensors become less sensitive, and IR LEDs work during the day while it’s designed to work during the night and more hidden problems happen due to neglected cleaning of security cameras.
So, my advice to you is to set regular days to clean all components of your security system to get rid of issues that affect your camera performance, and also to get condensation out of security camera when it’s formed immediately.
Now
How to Get Condensation Out of Security Camera and Prevent Moisture?
Now that you know some of the reasons why your security camera might be getting condensation, let’s take a look at how to solve it.
Method1: Clean the Security Camera
As we mentioned previously cleaning security cameras is important and must be done from time to time, and here are the steps to do this task correctly
1- Remove the Battery
If you have a wireless security camera or a wire-free one, the first thing you’ll need to do is remove the battery from the security camera.
On the other hand, if you have a wired CCTV camera then make sure to remove the power adaptor from the electric outlet, This will help to prevent any damage to the camera while you’re cleaning it.
2- Unscrew the Camera
Next, you’ll need to unscrew the security camera from its mount. This will give you access to the camera so that you can clean it properly.
3- Wipe Down the Camera
Once you have access to the camera, you’ll need to wipe it down with a clean, dry cloth. Be sure to wipe down the lens and the body of the camera.
You might also want to use a can of compressed air to remove any dust or dirt that’s accumulated on the camera.
4- Reattach the Camera
Reattach it to its mount. Be sure to screw it in securely so that it doesn’t come loose while you’re using it.
5- Turn on the Camera
Now, you can turn on the camera and test it out. You should see a clear image without any condensation.
These are the short steps to get condensation out of security camera, you can watch the next video to learn more on this topic
Source: Combizz Technologies
Method2: Put Anti-fog Spray on Security Camera
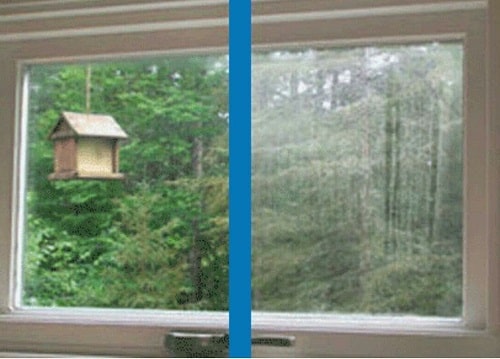
The issue of condensation does not happen on security cameras only, it occurs on every surface with glasses.
For example, people who wear eyeglasses suffer from condensation when they go from warm weather to cold.
Not only for eyeglasses but also for mirrors in the bathroom when the temperature inside the bathroom is equal to room temperature and once you turn on hot water condensation starts to form on the mirrors.
For these cases, there is a simple solution that may be helpful for security camera lenses and mirrors of your house, this solution is by using an anti-fog spray.
Using this chemical spray it works to minimize the surface tension which results in making a thin film of water instead of droplets.
This thin film makes you see clear images as there’s no condensation happening before.
Method3: Put Security Cameras in Well Protected Places
Aside from using a spray or wiping the lenses of the camera regularly, you can use one effective method that stops condensation for a long time.
The solution depends on putting a security camera that you’re using for outside monitoring in a waterproof box, or any shape that protects the camera from direct rainwater.
It does not stop at these limits, using a well-protected box increases the camera’s lifespan and keeps it away from birds and insects.
Moreover, the camera inside the box won’t form any condensation because there is no change in temperature between the air inside the camera and the air inside the box, both are at the same temperature.
Method4: Use Silica Gel/Desiccants
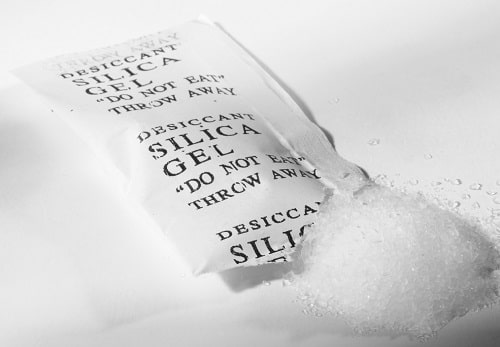
When you first purchase an outdoor IP security camera you found a small packet of silica gel inside the package.
This small packet is used with electronic devices to prevent condensation over time.
What is happen and makes your security camera gets moisture inside it is the silica get or the desiccant packet is used for a long time which makes it lose its effectiveness.
In that case, you have to change the old packet with a new one, not only also you have to let the camera be turned off for 4 hours to enable the packet to absorb the moisture and after that, turn it on normally.
Method5: Install Security Cameras in Warm Spots
Without having to apply any of the above methods you can use this effective way to get the moisture out of the security camera.
Simply, condensation happens when there’s a change in the temperature of the ambient area of the security camera, and it happens at night in most cases.
All you have to do is to change the camera location and find a new location where the temperature is still warm day and night. But how cloud this happen?
Well, you can put your camera in a place where sun lights come to it during the day, and at night you can mount a powerful light source near the camera to warm it up and prevent condensation from happening.
Note that applying this method will stop the issue of getting moisture or condensation inside the camera but you should know that you may face other issues related to glare if you direct the light source to the camera lens.
But don’t worry! You can solve this problem before it starts and mounting the light source next to the camera and giving it the same direction as the camera lens.
In case you have a dome camera and notice a glare on the cam videos you use one of the effective methods to get rid of glare on security cameras.
FAQS about “ How do you get the moisture out of a security camera?”
Now after we finish the important part about the reasons for condensation and the ways to get rid of it, it’s time for answering some of the common questions about condensation and moisture in surveillance cameras.
Q1: Why is it necessary to clean the camera?
It’s important to clean your security camera because condensation can damage the camera. If the water droplets get inside the camera, they can cause the electronics to short out.
This can render the camera useless and can even be a safety hazard. Cleaning your camera will help to prevent this from happening and will keep your camera working properly.
Q2: How often should I clean my camera?
You should clean your camera every few months to ensure that it stays in good working condition.
However, you may need to clean it more frequently if you live in a humid environment or if the camera is constantly exposed to cold temperatures.
Q3: What should I do if my camera is already foggy?
If your camera is already foggy, you’ll need to unscrew it from its mount and wipe it down with a clean, dry cloth.
You might also need to use a can of compressed air to remove any dust or dirt that’s accumulated on the camera.
Once you’ve cleaned the camera, you can screw it back into its mount and turn it on. You should see a clear image without any condensation.
Q4: My camera is still foggy even after I’ve cleaned it. What should I do?
If your camera is still foggy after you’ve cleaned it, you might need to place it in a warm environment. This will help to prevent the water droplets from forming in the first place.
You can also try using a dehumidifier to remove any moisture from the air.
Conclusion
Condensation can damage your security camera and obscure your view. However, you can clean your camera and prevent condensation by following the steps above.
Be sure to remove the battery before cleaning the camera and to screw it back into its mount securely.
You should also wipe down the camera with a clean, dry cloth and use a can of compressed air to remove any dust or dirt.
We hope this guide was helpful. If you have any further questions, please feel free to contact us.
