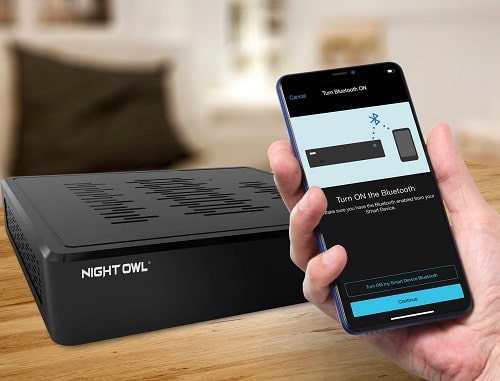
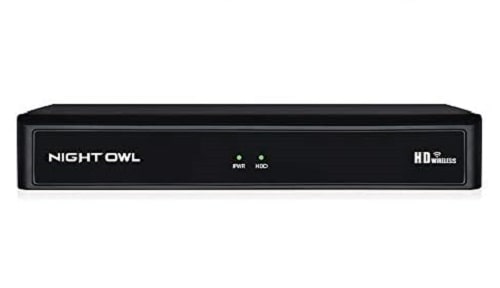
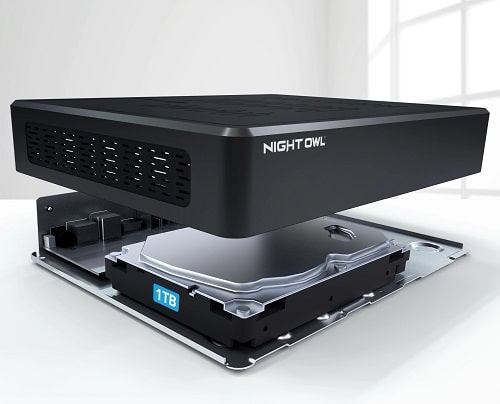
You might think that it’s a difficult task to delete security camera footage Night Owl camera, DVR, or NVR.
However, that is not the case; it only takes a few simple steps to clean your Night Owl surveillance camera storage to make it empty again.
As we know, Night Owl is one of the most brilliant security cameras that exist in the market with simple designs and powerful features.
Unfortunately, the many unique features provided by the camera exhaust a lot of camera storage.
For this reason, users should also pay attention to their security camera’s storage capacity to get the best experience from their device.
So, in this article, we will show you a variety of simple steps to manually delete any unwanted recordings from your Night Owl DVR, NVR, or standalone security camera.
We will also discuss some other points of interest, including how to clear your recording history, where to find your saved footage, and Night Owl’s multipurpose DVR/NVR user guide.
Now,
What Are the Benefits of Deleting Security Camera Footage?
Deleting old footage from your night owl security camera or from any other camera you have regularly helps you to increase the longevity and performance of your camera.
Furthermore, it also saves you from additional expenses on makeshift storage options, maintenance costs due to a jammed or faulty internal memory, etc.
But, How?
Well, A less clustered storage space can significantly improve your device’s efficiency and overall output.
Whereas, a congested memory will reduce your security camera’s performance, causing you to miss vital footage or corrupt important snapshots and video recordings.
How Long Do Night Owl Security Cameras Keep Recordings?
Similar to other security camera brands, Night owl offers 1600+ hours when the camera is adjusted on non-stop recording mode which is the default. This period can be changed according to many other factors such as the number of cameras used in the system, compression technology, camera resolutions, and recording mode selected.
The nonstop recording functionality offered by Night Owl is available by default under the ‘Continuous Recording’ feature. This option also allows the system to automatically overwrite older footage once you run out of storage space.
As a result, it minimizes the risk of full storage issues, if you’re too busy to manage your store manually.
Not only that, Night Owl allows you to manually personalize the storage period of saved footage. You can determine how long you want to save recordings to remain on your device before getting deleted automatically.
If you want more information on this subject, you can contact Night Owl’s customer support service and enquire directly to get a more detailed response.
How to Delete Security Camera Footage from Night Owl Camera (DVR) By Using Mobile App?

To delete security camera footage from Night Owl DVR you haven’t need to be an expert. In just a few steps, you can complete the process successfully.
Depending on the model of DVR you have installed in your house or business, you may also need Night Owl’s associated mobile app or desktop viewing software.
However, here’s a fast method to get the job done quickly:
- Plugin the power adapter of the video recorder device, Then Turn it on.
- Login to your Night Owl account By entering your Username, and Password.
- Make sure your DVR is linked with the mobile app. If not, try to link it again.
- From the Application Home Page, Tap on the MENU button.
- A list of linked devices to the mobile app will appear, Tap on the DVR icon.
- Select the “My DVR” option if you find this feature.
- Under the DVR menu, Choose MY RECORDINGS on the mobile screen.
- Use the arrow keys on your mobile application to find the footage(s) you want to erase.
- After highlighting the footage, tap on the OK button.
- Toggle DELETE and press OK.
Now, You’ve successfully deleted the annoying footage from your DVR, and you can use it again to record new videos and images.
How to Delete Security Camera Footage from Night Owl NVR Directly?

Again, Getting rid of unwanted video recordings on your Night Owl NVR device is as simple as doing it on your DVR.
Depending on your model, you might need to connect it to a computer or display screen to enter your security camera’s SETTINGS screen. Once you have accessed this feature, you can start to delete unwanted footage.
On this screen, the steps to follow are similar to the previous ones:
- Plugin your Network Video Recorder adapter, then turn it on.
- A live view of system cameras will be shown on your display screen.
- Use the mouse, After that, Press on the right Click to see the menu.
- The menu list will appear at the bottom of your screen.
- Go for the recording setting, and tap on the NVR icon.
- Select the RECORDINGS that you want to erase from the NVR recording page that appears on the screen.
- After deciding which videos, and images you want to delete, and highlighting them, tap on the OK button.
- Toggle DELETE and press OK.
Applying the above steps will help you in deleting security camera footage whether all the recorded data or specific video clips.
How to Delete Security Footage from Night Owl HDD?

For regular maintenance, some homeowners clean the video recorder to keep it in new condition, one of the cleaning steps is to take off the DVR/NVR screws and remove DVR parts, and wires.
Camera owners find this is a great opportunity to delete footage from the HHD of the NVR/DVR.
So, If you’re one of them and your recorded footage is stored on an HHD device, you can use these simple steps to delete them permanently:
- Get an HDD cable, whatever SATA or SATA to USB cable, and choose what you need.
- Turn on your computer, and ensure that the SATA cable is connected successfully between your Hard drive and computer.
- On Computer, Press the This PC icon, then a list of devices and drives of the computer will open immediately.
- Go for the external HDD icon, and click on it.
- On your HDD page, you’ll find a list of all the available recorded videos listed according to the recording date of each video.
- Check every video, and select the one you want to delete.
- Once you highlight the video, open it and ensure it’s what you want.
- After checking, click on the Delete button on the computer keyboard.
- Another way is to use a mouse, then press on the right-click, and from the menu click on delete.
- Now you’re finished deleting the unwanted video from the security system HDD.
- In case you want to format your Hard drive, you can select all the recorded videos and delete them at one time, or on the HDD icon click on it and choose format.
After completing these steps, your drive will be erased and refreshed to start recording new footage.
How to Delete Security Camera Footage from Night Owl Camera SD Card
The simplest means to delete unwanted footage from your standalone Night Owl security cameras is to format the SD Card that is used to store footage.
Usually, there are two ways to go about this. First, You can do it directly using the Night Owl security camera’s built-in software.
Second, you can take off the SD card from your camera and insert it into a card reader to open it to the computer then initiate the deleting procedure. Once complete one of the 2 ways, all unwanted recordings would be wiped clean.
Here’s how to go about it:
Method1: Deleting Footage Using a Computer:
These are the steps that are used to delete security camera footage night owl standalone camera recording on an SD card.
- Remove the SD Card from your night owl security camera.
- Place the SD drive inside a card reader.
- Insert the card reader into the computer.
- Open the card reader from your system’s file manager.
- Toggle SD Card and highlight the specific recordings to delete.
- Select the delete option and hit the enter key.
Note that, this method is considered the best and the safest option for beginners who want to clean their camera card from unused videos.
Method2: Deleting Footage Using Night Owl’s Built-in File Manager Software:
Many night owl security cameras that support an SD Card come with built-in file management software.
To access it, you may have to connect your device to a computer or a compatible viewing screen. After that:
- Log in to your device’s IP: input your device’s IP address details in one of your computer browsers.
- Enter your device’s Username and matching Password.
- You can use the device’s QR code to find your camera’s IP details if you’ve forgotten them.
- Enter the Settings Page.
- Go for Storage Section.
- Toggle Micro SD Card.
- Select Format to erase all unwanted video footage.
Aside from the first methods, this way is suitable for non-tech persons who don’t need to involve in removing and inserting SD cards regularly.
Method3: Deleting Footage Using Night Owl’s Supported Mobile App (if available):
Some night owl security cameras that support SD Cards also feature a native mobile app.
For cleaning storage, and deleting old videos, all you need is to download and install the app from PlayStore or App Store.
After that, pair the app with your security camera and then re-launch the application on your smartphone.
Once you open the app, select settings and toggle your SD Card. From there you can select, format, or erase specific footage from the drive.
How Do I Clear my History on my Night Owl Security Camera?
Not only for security camera footage, sometimes your security camera’s history might get filled up, and in this case, you may want to carry out a quick refresh.
Here’s how you can achieve this successfully:
- Download and install Night Owl’s official app on your smartphone.
- Open the app.
- Log in with your account, If you don’t have to create a new one.
- Scroll to the “CAMERA” option and select it.
- Select SETTINGS.
- Go to VIDEO HISTORY.
- Press and hold to see the pop-up menu.
- Tap on the following ‘Delete’ prompt to permanently confirm and erase your entire history and snapshots.
Note that, you should be careful when deleting any of your security camera data to avoid missing it permanently.
Where are Security Footages Stored on Night Owl DVR/NVR Security Camera?
Your storage options capacity depends on the model of Night Owl security camera you are using.
Most of the company’s video surveillance systems usually store recordings on a locally mounted SD card, Hard drive, external storage drive, or online on cloud storage.
Both storage methods are popular among NVR/DVR (network video recorder or digital video recorder) IP systems and analog systems.
So, before you purchase a night owl security camera, make sure you decide and select the best storage for your camera footage, and videos to keep them for a long time.
Pro Tip: Read Night Owl DVR/NVR User Guide
It is advisable to exhaustively study your Night Owl security camera’s user handbook.
You can easily find whatever information you need regarding any subject. Also, you will be up-to-date with newer features and explore your new device with ease.
As we know, Night Owl’s DVR and NVR boarding security cameras have several advanced features and functionalities.
You can log onto Night Owl’s official website to download a digital copy of the DVR/NVR user guide if you’ve lost your print copy.
All you have to do is to specify your camera’s model and other required information and then hit the download button.
Conclusion
Finally, we must say that It is easy to delete footage on your Night Owl security camera.
It only takes a few simple steps like any other task related to the security camera and surveillance systems.
Once you’ve got a hand on what you need to do, the rest is a breeze what I mean is It’s essential to monitor your device’s storage status regularly.
Deleting unwanted security footage is highly beneficial to your camera’s longevity and work efficiency. Plus It also eliminates the need for additional storage which in terms of costs you more money.
The simple steps highlighted in this article will help you eliminate any unnecessary recordings.

