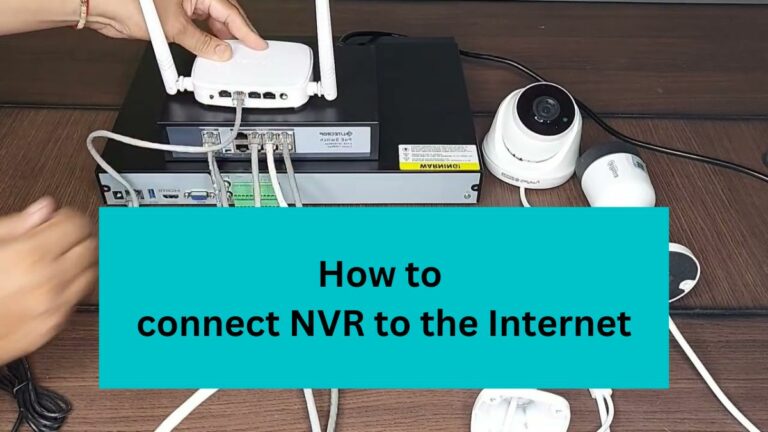
Having an NVR is beneficial to your surveillance system, but to get the benefit of all of its functions, you should connect NVR to the internet whether wireless through a router or wired by using an Ethernet cable so you can enjoy the online features available.
Unfortunately, most recent users refuse to link their network video recorder to the internet because of hacking, and online threats.
However, without internet connectivity, the NVR will eliminate some of the amazing advantages of the system and set some limitations to the security system such as
1- No remote viewing: Camera owners will not be able to access the live feed or recorded footage of their cameras remotely, via a web browser or mobile app without an internet connection.
2- No more software updates: if the NVR isn’t connected to the internet, it will not be able to receive software updates like firmware, and performance enhancements, which can lead to security vulnerabilities and bugs.
3- Less control over system cameras: linking the system’s main video recorder allows users to view and control their cameras remotely.
However, if the NVR doesn’t have internet access, then the customers will be able to control their cameras, such as pan, tilt, zoom, or even turn on/off the cameras.
4- Only local Storage: one of the main disadvantages of not connecting NVR to the internet is the system will rely only on local storage options such as HDD, and micro SD cards.
But with internet access, you can take advantage of cloud storage services to store and access your recorded footage from any place around the world.
5- Limited integration with other devices: Another thing that users miss if they don’t want to connect their NVR to the internet is that their NVR will not be able to integrate with other smart devices and systems such as Amazon Echo, Google Home, and IFTTT.
So, in this blog post, we’ll introduce different ways to connect NVR to the internet whether wired or wirelessly.
First: How to connect NVR to the internet Wireless
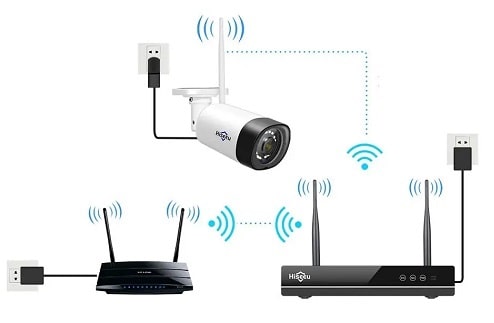
If you have a wireless NVR kit and you want to connect it to the internet, then this way is suitable for you.
In this method we’re gonna link NVR to a home WiFi router without network cables, the only cables we need to use are the power cables. Let’s see the steps
Step 1: Make the Power Connections

Before you take advanced steps to connect NVR to the internet, you need to make the required power connections for your surveillance system.
Usually, NVR and internet modems are powered by a DC power adapter, you just need to take each device power adapter and connect it to the nearest electric outlet.
Keep in mind that the NVRs differ in the voltage required to run the video recorder unit. For example, wireless NVR is powered by a 12v DC-powered adapter, while PoE NVR is powered by a 48v power adapter.
Concerning system cameras, if they come with power adapters, after installing them in the right spot, plug the power adapter into one of the electric outlets that exist beside the cameras.
However, some security cameras are powered by rechargeable batteries, and in most cases, these cameras are designed for outdoor activities, not indoor ones.
Anyway, once you connect whether NVR or router successfully, turn the device on from the “Power” button for every unit.
Please note that before you progress with the next steps, you ensure that the power supply for all devices whether NVR, router or cameras is stable and connected to the power source.
Step 2: Link IP Cameras to the NVR
Connecting NVR to the internet doesn’t stop on power connections, there are additional things that must be done to make everything work normally such as linking IP cameras to your network video recorder.
When it comes to connecting IP cameras with NVR, or routers you need to download the official mobile application and install it on your smartphone so you can access the wireless cameras and link them to the WiFi signal.
However, there are brands of NVR that have a built-in antenna, and the cameras are pre-installed to the video recorder, you have just to power the NVR.
Moreover, you need to connect NVR to the TV so you can enter settings, and network configuration to link cameras to the video recorder.
To do this, you should know that each NVR panel has an HDMI port, and in some cases, HDMI and VGA ports.
Simply, Check your NVR ports, and based on what is available, get a cable and connect it from the back of the network video recorder directly to a monitor or TV.
Step 3: Connect NVR to Router WiFi
The 3rd step and considered the most important one in this process is to connect NVR to the router’s WiFi signal.
On the display monitor, open the NVR page, then enter the video recorder admin username, and password, then follow the below steps:
- Go for the Network> TCP/IP section.
- Change the NIC from Wired to Wireless.
- Click on the “Save” button.
- Go back to “Network Settings or Wireless Setup Menu”.
- Press on the “Search” or “Scan” button to see the available wireless networks..
- Select the name (SSID) of your router wireless network from the list.
- When required, enter the password for your wireless network.
- Finally, click on the “Apply” or “Save” button.
At that time, your NVR is linked to the WiFi signal but there’s a DHCP setting that you should ensure is it enabled/disabled to avoid IP conflict.
To know exactly how to connect NVR to a WiFi signal, watch the next video
Source: D-Link
If you have any issue applying the above steps from the display screen, then you can connect NVR to your laptop, or if you have a PC you can connect NVR to a router WiFi signal.
Step 4: Configure the Remote Viewing Settings
The 3 above steps will enable you to watch your cameras through any device connected to the same WiFi signal.
To be able to view your IP surveillance cameras online where you’re far away from the NVR, you need to activate the port forwarding feature for your video recorder.
This feature is a group of rules set together to make your NVR broadcast the camera feeds online.
Once the NVR is connected to the internet and the port forwarding rules are configured successfully, you can access the live feed and recorded footage remotely, via a web browser or mobile app as if you exist in the same place.
Note: The steps may vary depending on the specific NVR model you are using, so it’s important to consult an expert or read the user manual for detailed instructions.
In case you have an Hikvision NVR and want to setup port forwarding for remote viewing, watch the following video
Source: Hikvision Technical Support
Second: How to connect NVR to the internet Wired
While connecting NVR to the internet wirelessly seems to have a lot of benefits, there’re still some people who prefer the wired traditional way.

The reason behind that is they fear wireless signals being hacked by burglars or being jammed by anyone who wants to disable or stop their surveillance system.
For wired systems, there’s no WiFi signal, the system devices are connected to each other with network cables such as cat5, cat5e, or cat6 to provide a durable link between system components.
More than that wired PoE systems are not easy to damage, and if someone attempts to do so, he will spend a lot of time disconnecting all your system devices.
Now, let’s see the steps on how to connect NVR to the internet with cables:
Step 1: Connect the PoE IP cameras
To start everything in the right way, you should prepare the required tools, wire route of each camera, and also know the steps that you’ll take to connect NVR to the internet with cables.
Basically, the first step in this process is to connect PoE cameras to the NVR and ensure all of your IP cams get the signal through the cable.
To do this, measure the distance between each camera and the PoE network video recorder, and ensure that there’s an extra length of 1 or 2 feet in each cable for future use.
After that, take an ethernet cable and link it between the Lan port of the NVR and the cameras, and do the same with other PoE cameras.
Step 2: Turn on the NVR and Router
While wired NVRs are PoE NVRs but they still need a direct source of power so they can provide other system PoE devices with power, and data.
As a general rule of thumb, there are two models of NVRs, PoE NVR, and wireless NVR, they differ in specs, and also differ in the voltage required to run them.
For example, PoE NVRs are powered by a 48v power adapter, unlike wireless NVRs that are powered by a 12v DC-powered adapter.
Anyhow, take the power adapter from the video recorder package, plug it into the power input of the NVR unit, then plug the main power socket into the wall electric outlet.
Concerning the router power, we mentioned previously that it’s powered by a DC adapter.
Once the IPs, NVR, and router are connected together, start to power on the router first, then turn on the NVR, and cameras.
Note that if you have a large PoE system and you’re utilizing a PoE switch consider powering the switch.
Step 3: Connect NVR to the internet Router
Connecting NVR to the internet doesn’t stop on power connections, there are additional things that must be done to make everything work normally.
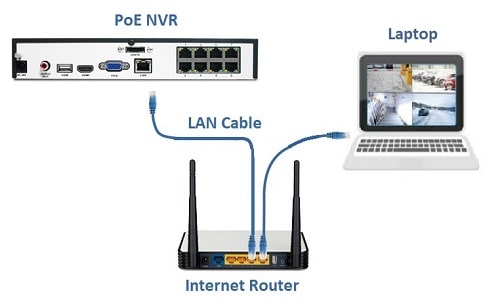
You should connect your NVR to a router for internet connectivity so you can go forward with other settings.
Simply, take the 1st end of the ethernet cable and insert the rj45 in the LAN port of the NVR, then take the 2nd ethernet cable end and connect it to the LAN port of the router.
Afterward, you have to set the network configuration for your NVR, adjust the sensors and alarms, set up the storage medium whether HDD/ cloud storage, and more.
In case you’re using a PoE switch, you should link the NVR to one port of the PoE switch, then connect the PoE switch to the router.
Note that the PoE switch can be used to combine more than one NVR together and connect them to a router through one cable between the switch and the home router.
Step 4: Test the Connections
Now everything is ready and with the simple setup, you’ll be able to watch your PoE cameras on home devices, or remotely.
For watching NVR on a PC, or any other home laptop, you just have to get the NVR from the settings, then enter it into one of the web browsers so you can view camera feeds.
On the other hand, remote viewing requires additional setup, you have to enable port forwarding, then set rules, and more.
On mobile it’s a little different, you need to download the mobile app, add the NVR with linked PoE cameras, then you’ll be able to watch your system remotely.
Useful link: What are the best Outdoor Security Cameras without Monthly Fees.
Can I turn Wired NVR to Wireless?
The answer is YES, you can turn your wired NVR/DVR to wireless by using a USB WiFi adapter so your video recorder can send/receive data through WiFi signals. On the other hand, if you have a PoE NVR you can purchase an ethernet WiFi bridge to link your wired PoE NVR with other WiFi signals available in the place.
Note that the ability for your wired NVR to be turned into a wireless unit depends on compatibility with other devices, hardware, and also the software used on video recorders. Old NVRs sometimes couldn’t be converted to wireless because of old firmware, and leaks of dual NIC ships.
Does NVR use an Ethernet cable?
PoE NVRs use an Ethernet cable for connecting with other network devices, and PoE cameras. Other wired NVRs use ethernet network cables for linking to the internet router through the LAN port.
While wireless NVR kit doesn’t use any cables and it’s connected to cameras or other devices through the WiFi signal of the video recorder.
Does an NVR have an IP address?
Basically, each network device in the security system has a unique IP whether NVR, DVR, or camera. All of them get an IP to make the system and users manage each device separately from the IP.
However, there are two types of IPs (Dynamic & Static) used with surveillance cameras, and video recorders. Both have different use according to what you need, and how you want to configure your system devices.
Before you go…
Connecting NVR to the internet is important to make your system get the latest updates so it works fast without facing crucial issues such as NVR overheating, noise, and more.
Moreover, the internet connectivity for network video recorders allows you to enjoy some additional features such as remote viewing and controlling.
Related Articles:

