Installing camera system on concrete is considered one of the most effective solutions for homeowners and customers.
People love to have reliable strong buildings made from concrete and prefer it from other types of materials.
But when it comes to installing a security camera system on concrete it’s too hard to do.
So, a lot of customers go for other alternatives such as installing security cameras on a Brick wall, and running wires through soffit.
But, Don’t worry, I have installed a lot of systems before on different materials such as concrete, wood, metal surfaces, and more.
In this guide, I will explain how to install camera system on concrete in detailed steps at a meager cost without spending extra money on its installation fees. Plus, I will mention the tools I used.
What are the tools used to mount security camera systems on Concrete?
Installation of a wireless security camera system at your home or in any place needs powerful tools to make the task easier.
The type of equipment required for the installation process is
- Protection Glass
- Ladder
- Hammer drill
- Marker
- Adhesive Tape
- Screwdriver
- Screws and anchors
- Power cables and adapters
These are the tools I used in mounting security cameras on concrete. You may have some of these tools in your home. If you don’t, you can borrow it from your neighbor or friend.
Now, Let’s see the step of
How to Install Camera System on Concrete
Installation of a security camera system on concrete at your home on your own is now a game of art.
It is just a few steps with a few technologies, and you are done without paying extra money for hiring professional installation.
Step1:- Select Camera Location
Install camera system on concrete at your home or anywhere depending on your location selection.
By selecting a good location you get a wide coverage angle of your area and properties, and your cameras will be able to capture clear footage.
So, here are important points to consider before choosing a cam location
- Good Lighting: The spot should be well lit, that a certain amount of sunlight comes to that spot, and it is also somewhat lit at night.
- Bad Weather: The camera location should also be protected against bad weather and should not be in very direct sunlight.
- Keep it High: It should also be away from others’ access for theft and tampering.
- Best Places: the best site to place cameras is the top corners of the walls like the attic or the point where walls and ceiling meet.
- Clear View: Selecting an empty space is very important for capturing images without anything blind the camera lens.
- Power Outlet: If you have a wired surveillance system, You must mount your CCTV security cameras near the power outlet.
Concerning all these points will make your monitoring system work in high efficiency and record detailed videos.
Also, Installing security cameras in the correct position and angle will make the camera feature such as motion detection, Night vision, and live viewing work normally without stops.
Step2:- Put Mounting Template
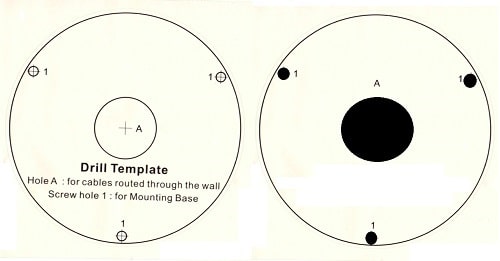
Installation of security cameras can now be started by marking the location on the wall with the help of mounting templates that came with your camera system.

If there are no mounting templates given with your security camera system, mark the point using a paint marker.
This step should be done so accurately with the help of adhesive tape because you won’t like drilling a lot of holes in your wall, costing you extra effort, and making your wall look bad.
This is why you should be very cautious when you mark points for drilling on the wall.
Step3:- Use Hammer For Drilling Holes
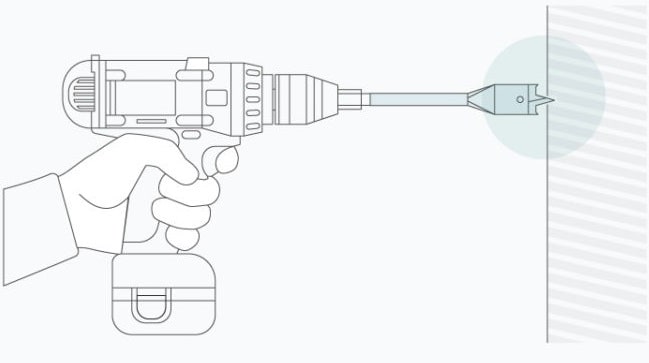
The next step for installing a security camera system on concrete is drilling the holes for mounting screws and anchors.

Before drilling make sure that one neat spot is prepared. While drilling, take hold of your drill carefully and correctly to avoid losing control.
If a mounting plate is provided with your camera system, there is no need to install the camera first but install the mounting plate on the wall.
The camera will be fastened later at the last step when the camera system gives the mounting plate.
Note: The size of the holes depends on the camera type you are using, some camera systems come with single wires plugged into the back of the camera, and other systems come with other leads that are needed to run through the wall cavity.
Step4:- Run Cables and Wires to Fill Holes
After finishing Drilling holes with the hammer drill, the next step is to run cables and connectors.
Run your lines through the holes and also through the mounting device, if given.
First, run the wire through holes from your CCTV cameras to the DVR/NVR.
Second, if you have more than one camera, repeat the previous step to connect all of your systems together.
Note: Security cameras come with two types of wires and their connectors, one connects with the power supply, and the other is associated with the video recorder (DVR/NVR) unless you are using a PoE IP camera or Wireless system.
You should also set up a spot for DVR where wires can easily be connected to the DVR.
Step5:- Attach the Security Camera
Installing a security camera system also requires a power source for your camera as we mentioned above.

Connect the power adapter of the camera to the power socket, and do the same with the DVR adapter.
Remember, your camera system and DVR will require a full-time power supply, so you should manage such a place where a continuous and complete power supply is given to the camera system and DVR.
Installation of the security camera system on the concrete wall is almost done, you can take a breath.
After finishing the security camera wiring process, connect wires of your camera to the DVR ports(in case you have more than one camera) and if not.
Just pass the cables through the mounting plate and fasten your camera to the wall with the help of screws.
Note: While mounting your camera, make sure that your camera won’t shake, vibrate, or wiggle; it could blur the image or give distorted image quality.
Step6:- Complete Setting up the Interface
The last step for installing the security camera system on concrete is the setup for your security camera system.
Depending on what type of camera system you’re using, connect the camera with your mobile phones, computers, laptops, tablets, whatever method is given.
Test the security camera features like live view, video recording, motion detection, zoom in and zoom out, night mode, and whatever your camera system gives you.
Set up your DVR storage if your camera system supports using cloud storage for storing camera videos.
Step7:- Fill Holes
At the end of how to install camera system on concrete guide, there is an important thing to do.
You need to fill the wall holes with any insulation material like silicon or wax. Doing this step will protect your cameras from rain, and dust.
Step8:- Use Conduits (Optional)
Professionals always use Conduits when they decided to install camera system on concrete walls.
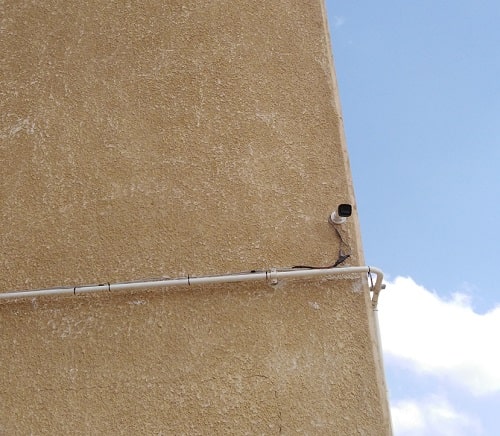
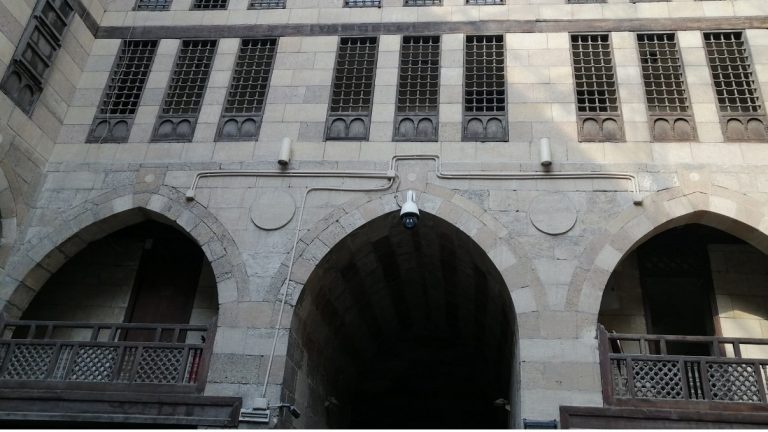
The conduits or cable raceways are effective tools in hiding and protecting camera wires especially outside of your home.
Simply, you plan where your camera cable will pass, and then calculate how the length of the wire route to see the number of conduits that you need to buy.
After that, Drill holes for conduit screws and then use a conduit strap to fix them and prevent them from moving. The conduits can be mounted indoors or outdoor.
Note: If you decided to use these pieces of equipment you should select a good location, and in case you want to extend the cable you can purchase a junction box to avoid security camera wire splicing that damages your home decor.
Read Our Latest Blog Post : How to Install Security Camera in Elevator
Tools Recommendations
To install camera system on concrete in the correct way, you should have the right tools.
In the past, I use the wrong tools to mount my security camera system on concrete walls, and I must say that I don’t do the steps accurately.
What happens after a few months, I saw my CCTV system stop working and some security camera problems start to appear because of inappropriate tools.
So, here are the tools I used when I need to install camera system on concrete long wall or house.
| Product | Specification |
|---|---|
| NoCry Safety Glasses | – Strong and Durable – Customizable |
| DEWALT Hammer Drill | – Battery Powered – 3-Speed – 40-Piece |
| Little Giant Ladders | – 17 Ft Size – Multi-Position Ladder – Aluminum |
| Ximytec Screwdriver | – Cordless – 45Pcs Screw Bits – 250RPM speed |
| DEWALT Masonry Drill Bit | – 7-Piece – Electric or cordless hammer drills – For Brick, block, concrete, and masonry |
| Swann BNC Coaxial Cable | – For CCTV System – 100 Ft / 30 M |
| ZOSI Cat5e Ethernet Cable | – High-Speed Network RJ45 Wire Cord – For PoE IP System – 100 Ft / 30 M |
| Stageek Cable Raceway Kit | – Easy to Install – 9×15.4inch – 9 Cable Channels |
The tools in the above table are considered the best, pick what you need and think it will be helpful for your job.
Summary:
At the end of how to install camera system on concrete guide, doing this task must be easy for you after reading the above steps.
These steps are explained in detail for beginners like mounting security camera without screws in the home. If you have experience with installing security camera systems you can do it yourself, it’s a DIY task for your home safety.
If you ask a professional to install a security camera system at the best places in your home, it will cost you a lot of money.
So, save that money by following these steps and if you face a problem you can contact us or write your issue in the comments.

